I had 2 extension cords that needed to be tested to find out why they were not working correctly. So with my knowledge, I learned from my father and working construction as a Heavy Duty Mechanic I learned how to fix these cords. The correct way and I have the tools to properly fix them. All I had to do is to get the male and female plug connections. One of them had to be a 2-phase and the other was a 3-phase. Being they don’t make a plug connection for a 2-phase I had to use 3-phase and minus the ground 

Now once you get your plug connections, remember to separate the part of the connections that connect to your wires and the housing. The housing part slips over the cord as per my pictures. Then strip down the insulation of your wires carefully with a wire stripper or a knife or razor blade. Be careful not to cut through the wire. Then select your contacts at one end of the cord. On my 2-phase I connected my wires to their connections, then I traced the wires through to the other end being sure before I connect my other end that they are all correctly connected. I checked with my multimeter still on the continuity setting and it is perfect.

2 phase cord being pulled through the housing of the new receptacle

2 phase cord connected to the female end.


Male End of 2 phase cord


Then I pull up the housings to the bottom of the cord and finish the installation on this cord and my meter says still perfect. Then I grab my ground fault indicator tester and plug my cord into the wall with my tester plugged into it and it read “open ground”. The only reason why it reads “open ground” is because this was as you remember only a 2-phase cord

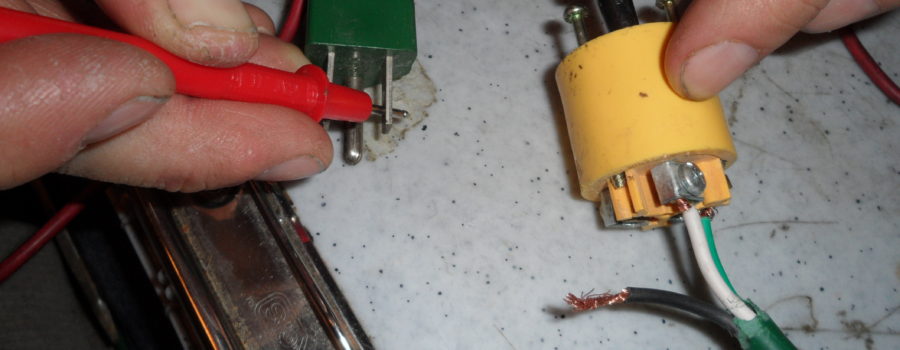
 Now we start the plug connection replacement on my 3-phase cord. Now with the 3-phase cord, it’s a little more difficult because it’s a heavier cord, there are three colors, and it’s an outdoor cord. The plug connection I am putting on this one is heavy-duty for heavier loads. Testing is more challenging. You HAVE to get this one correct. As you will see the colors are green, white and black. This cord only needed one end replaced. Now most people would say black is the ground but it is not ALWAYS the case. This one the ground is green when I tested this with my meter. I went to the ground of the male plug connection to the stripped of where the new connection was going so I continued on to testing the other two wires to make sure I did not have any dead spots in the wire with my meter because there was little surface damage to the outside cord insulation.


There was no damage to the cord after testing it with my meter so I was able to continue hooking up my connection. Moving forward to making sure which wire goes to which connection because it is polarized also. After all, safety does come first ESPECIALLY with electricity. Once all is connected, I do one last check with my meter, I do one last test with my ground fault indicator plug with my cord plugged into the wall and everything turned out good also with my meter and VIOLA! We have another working cord!!!


