As you know if you’ve been reading this blog, this is another repair I knew I eventually had to do on my Suburban. So I thought with this repair I would try to do it with only the items I have on hand, without having to spend extra money on this repair.
So, what I did first was to clip the wires holding the socket to the wire harness so I may have a better sense of what I can use to make this a quick and cheap repair. With my socket connection, there was still one wire connecting to the socket and the other one had broken off short of the socket, with just enough wire sticking out that I felt I could work with it to do something with it.


License plate Socket repair.
So my first thought was to go to my storage container that has all my wire crimp connections in. My thought was to find a crimp connection that doesn’t have any colored plastic insulation around it. So, I’m looking for just the metal itself. And this plan is to get in close enough to this little piece of wire to make a solid connection with the hopes to make this repair stick.

License plate socket trying to do a “no money spent repair”
Now I got it to work for which was my goal, but to also make it a “No money spent repair”! But no such luck! It wouldn’t work because my insulation was too old and brittle to make the hold count. I went online and found a great deal for replacement sockets for my application.

A continuity tester is used for a perfect flow of current from wire to contact inside of the socket.
So on to replacing the new sockets. What I first do is strip the wires on my rear harness for my license plate light. Then I go and turn on my marker lights so I can properly test which one is my positive wire and which one is my ground wire. Now I took a small piece of masking tape to help me identify my positive wire just so I will connect the wires correctly for my new sockets.

stripping my wire harness to test.

Marking my wires.

Wire stripper & crimper.
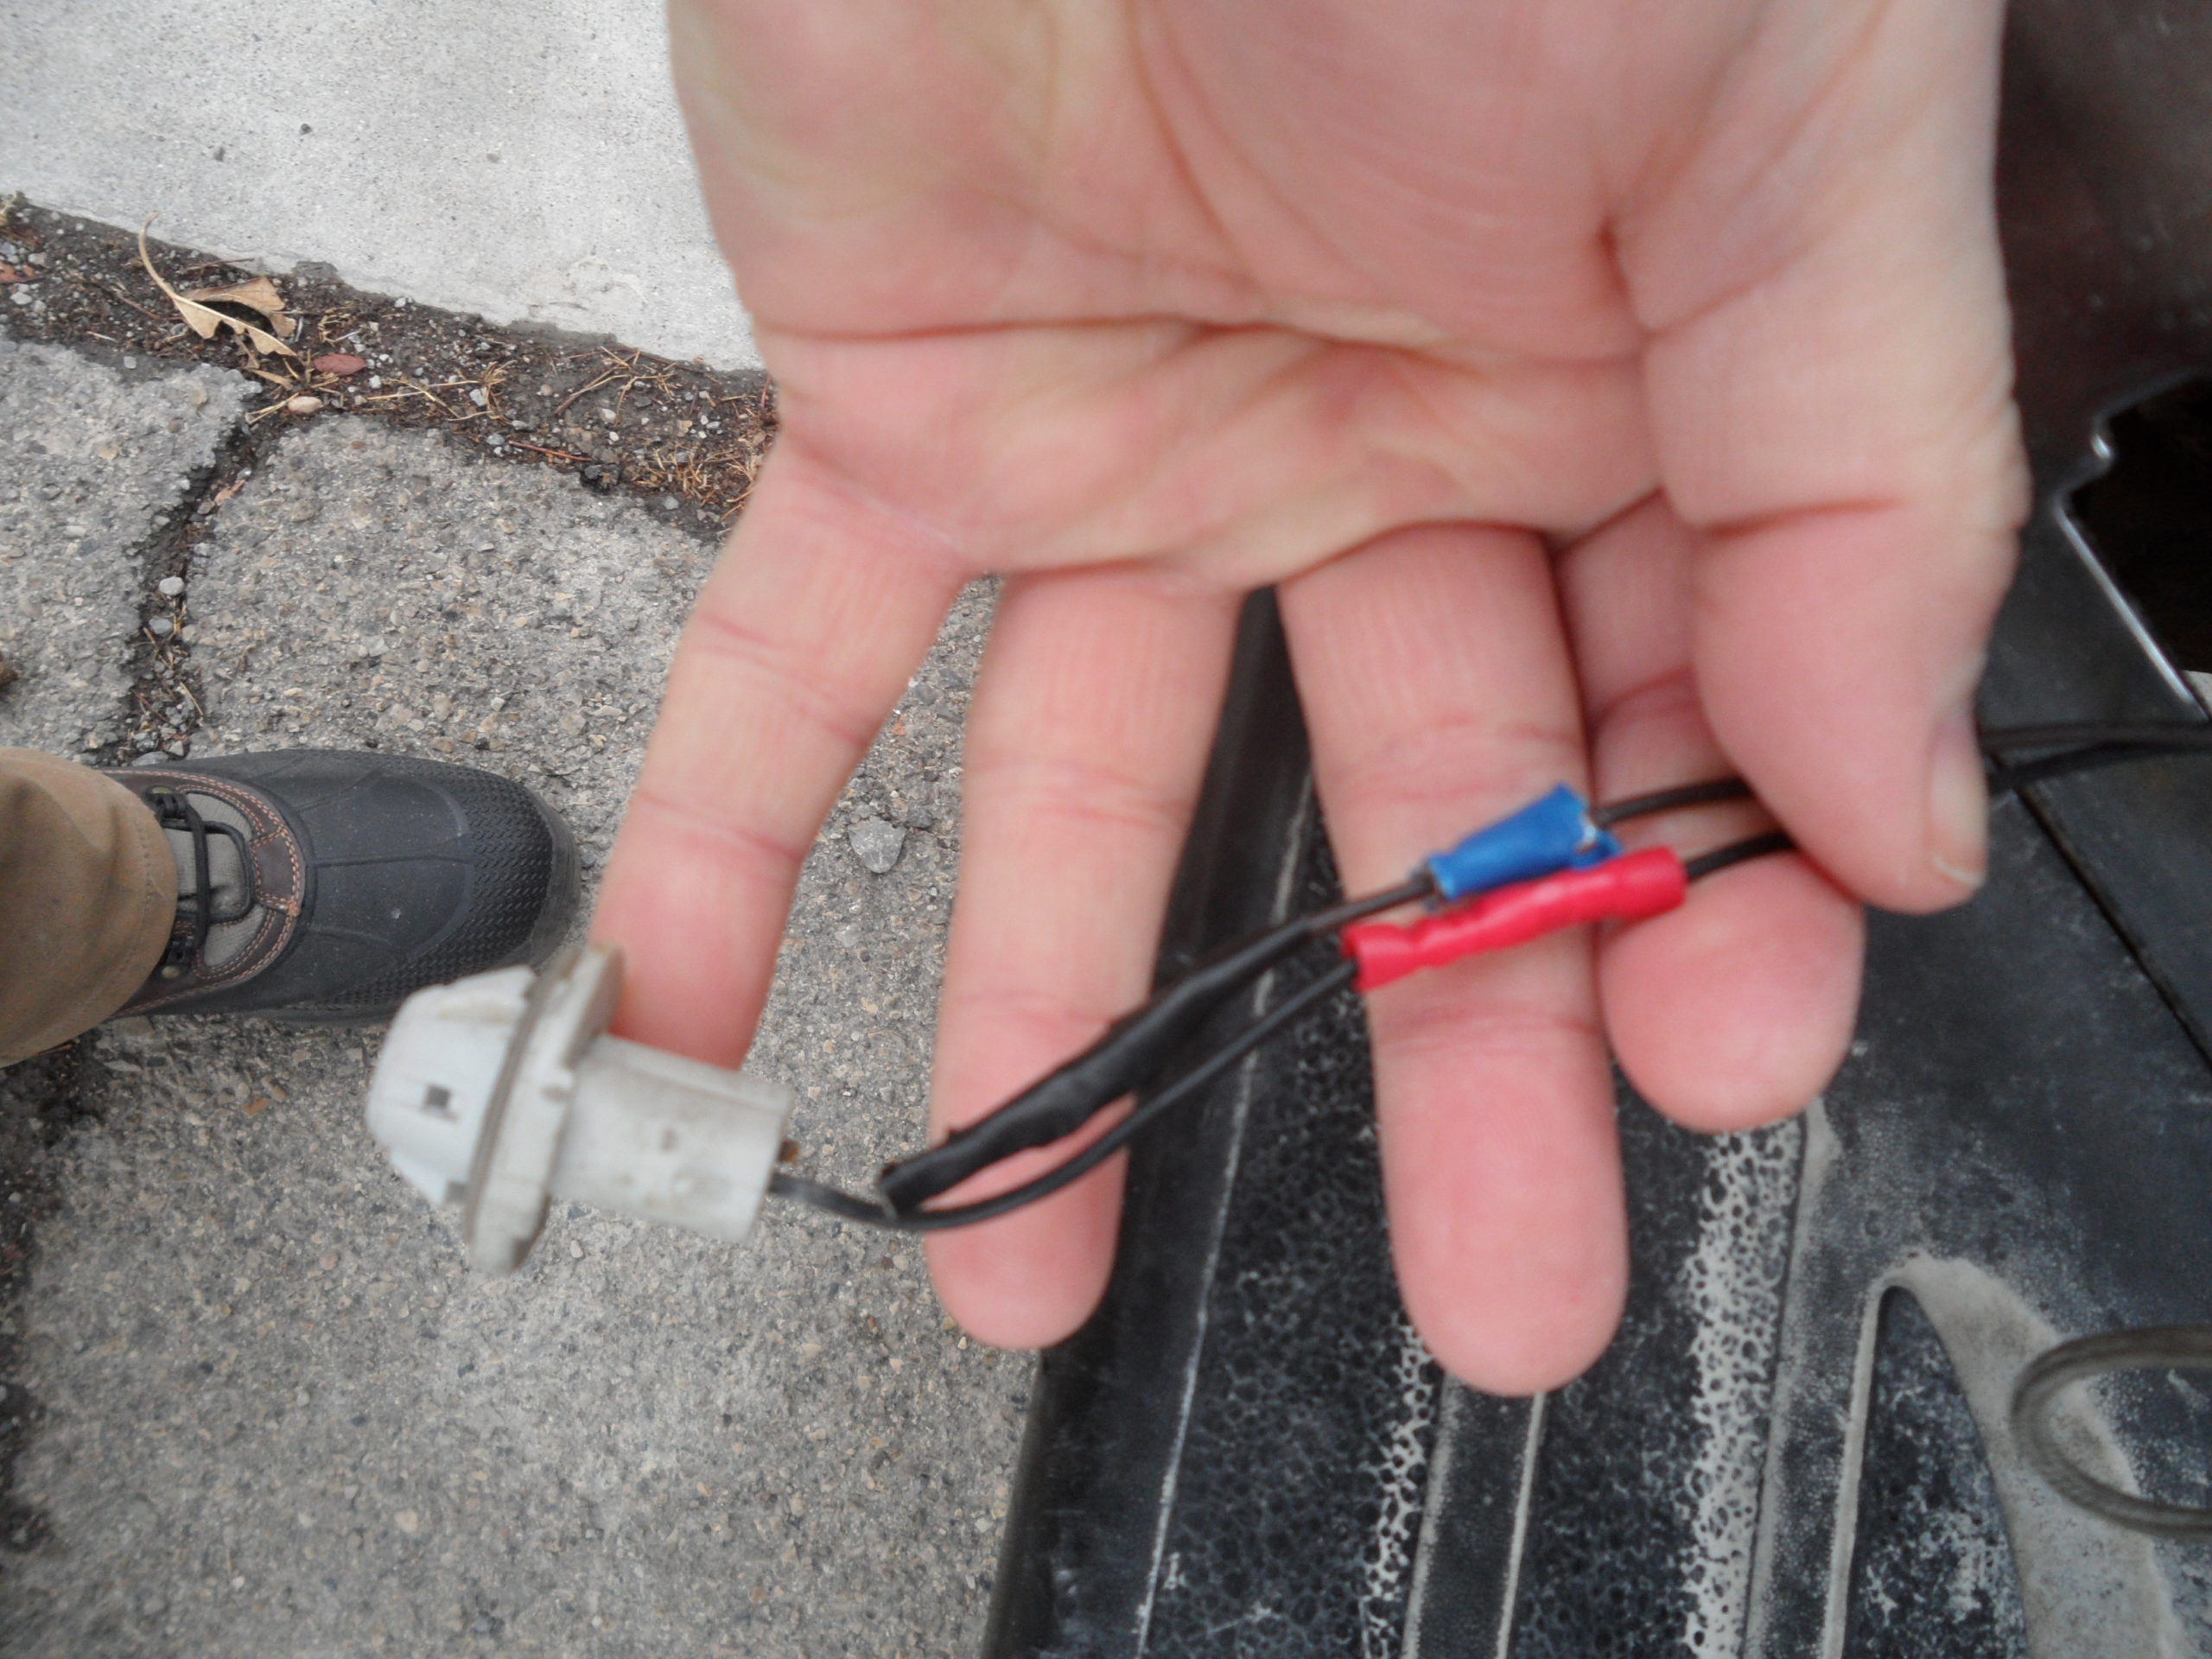
Once that is done, I put a red crimp connection on my positive wire and a blue one on my ground, this way I won’t screw it up! Now I can connect the first of my 2 new sockets. When I received my shipment I noticed my sockets, my wires on them were not color-coded. Here is where you need to have patience and take things slow to make this repair work properly.

Red for positive+ and blue for Negative-

My New connections are offset of each other because I want them to fit into their original location.

Blue Crimp connection for ground or negative-

Red for Positive+ and here I made my wires a little longer so they will go into the harness enclosure to protect them just like it was before. It’s always a good practice to give yourself EXTRA wire length in case you make a mistake? Just a good rule to follow.

Wire harness enclosure is what my goal is to re-insert my wires back into it.

My NEW socket is installed and working.
Now while I was doing this repair, I kept the marker lights on and was sure I had new bulbs in my sockets to aid me in knowing that my job was done right. Once my lights showed power and were illuminated, our last step is to insert them in housings for which they will be sitting from now on.

Wire harness enclosure with my new socket.
Of course, THE VICTORY CRUISE!!!!!!


