In this post, we will complete the brakes on this Tahoe by finishing the rear drums and shoes. We will start off by gathering the tools needed for this end of the vehicle. This is what you will need for drum brakes.
3-ton floor jack
A good heavy pair of jack stands
metric “X” wrench or “star” wrench!
A good Pry bar!
I also used my father’s pair of channel locks or you can use a pair of plyers
1/8th flat bit screwdriver/ also a #1 screwdriver
A can of brake cleaner
Oil drip pan to catch the brake cleaner or whatever you can find on hand (improvise if needed.)
Small ballpen hammer
Wheel chocks or something heavy to brace your front tires so they won’t roll forward or backward
The next thing to do is position the jack under the truck at a proper lifting point where it would be the safest the for vehicle. The best place on this truck was where the shock mount is located on the rear axle. Only raise it a little bit at first, just enough to loosen the lug nuts.


Once your lug nuts have been loosened, you can raise your vehicle and be sure to use your jack stands right next to the floor jack because safety is always first at anytime the vehicle has to be raised.

Now we are onto pulling the first wheel off. Set it off to the side out of your way or you can sit on it while your working. This is where your prybar will come in handy. We get to wrestle the brake drum off. If you have problems with this, work your way around the brake drum with the backing plate. Working it slowly will help loosen the drum from being stuck to the brake shoes. In my past experiences, the drums may be stuck against an axle hub from rust and heat and this is where your ballpen hammer comes into play. You would beat around the lug nuts and the outside surface of the drum may help may break the weld of the rust and the heat.


Now we get down to the fun part of drum brakes. As you can see, our shoes are VERY worn out! I started by removing the tension springs one by one with my channel locks. Then I started removing my automatic adjuster then I removed my lock washers and springs that have the locking nails that lock to them from the backside mounting plate.


Emergency brake arm. this whole assembly will have to go back in the same way as pictured.


adjuster out almost all the way out and will be turned into the body of itself to help us fit in our new shoes and drums.
Now here is where you want to be aware of where everything goes, take a picture if you have to if this is your first time doing brake shoe and drum replacement. Once those lock rings are taken out, most of it will start to fall out, and again be aware of where ALL your parts go because it will make the job go MUCH smoother.
There is an arm of solid steel with a spring on one side that sits behind the actual hub and just below the wheel cylinder. This bar does its job working for the emergency brake lever.


Big Bar holds E-brake in place till it’s released.
Here is where I put everything in a drip pan of the items from my brake hardware we will reuse, and I spray them with my brake cleaner. Then when that is done, I put my drip pan under the wheel and spray it all down with my brake cleaner also. Now we remove the little “C” rings that are holding the emergency brake lever to the rear brake shoe. This is where your 1/8th screwdriver comes in handy. Just pop the clip off and be careful not to lose it after removing it.

Lifting the wheel hub for any looseness of the bearing. I wasn’t sure if the previous person that worked on this truck checked this out? But I will just because the wheel is off.


This funny looking plate is in place to hold your shoes in place with the help of the tension springs for perfect brakes

What I’m doing here is testing the bearings while I have the wheel off our friend doesn’t know too much about the other people that have worked on it so I will not make that mistake again while I’m working on it
We are into the REASSEMBLY of the whole brake system now. The first part that needs to be done is your emergency brake lever that mounts to your rear brake shoe. Put your emergency brake lever into the proper hole in the new shoe as it was when it came out of the old one. Line the ” C” clip up into the little groove, when you find it then you can gently reinsert it with a pair of channel locks or plyers. Either one will work.

C-clip into the groove on the e-brake arm.

Once that is done, I get to put on the first shoe which I make sure that my nail from the backplate is inserted in the right hole of my shoe. Then, I reinstall the spring and lock washer just to hold it in place. But first, you’ll need to put on your automatic adjuster then your locking c-clip and locking nail. Then I go over to the front shoe and install the locking nail with the spring and lock washer for it also to hold in place. Now here I realize I have to make sure the shoes are connected to the wheel cylinder connecting arms because you DO NOT want to fight those at a later point.

The first installed shoe is my rear one. Be sure the shoe with the most lining is on the front of the wheel. Now install the emergency brake arm that goes under the wheel cylinder. Then I go install the upper springs with my trusty channel locks. ” I know they’re specialty tools out there to make this job easier but I’ve been doing it this way for so long even though it may seem harder for some when you need to work on vehicles and you don’t have lots of money for all the CORRECT tools you need to improvise.”


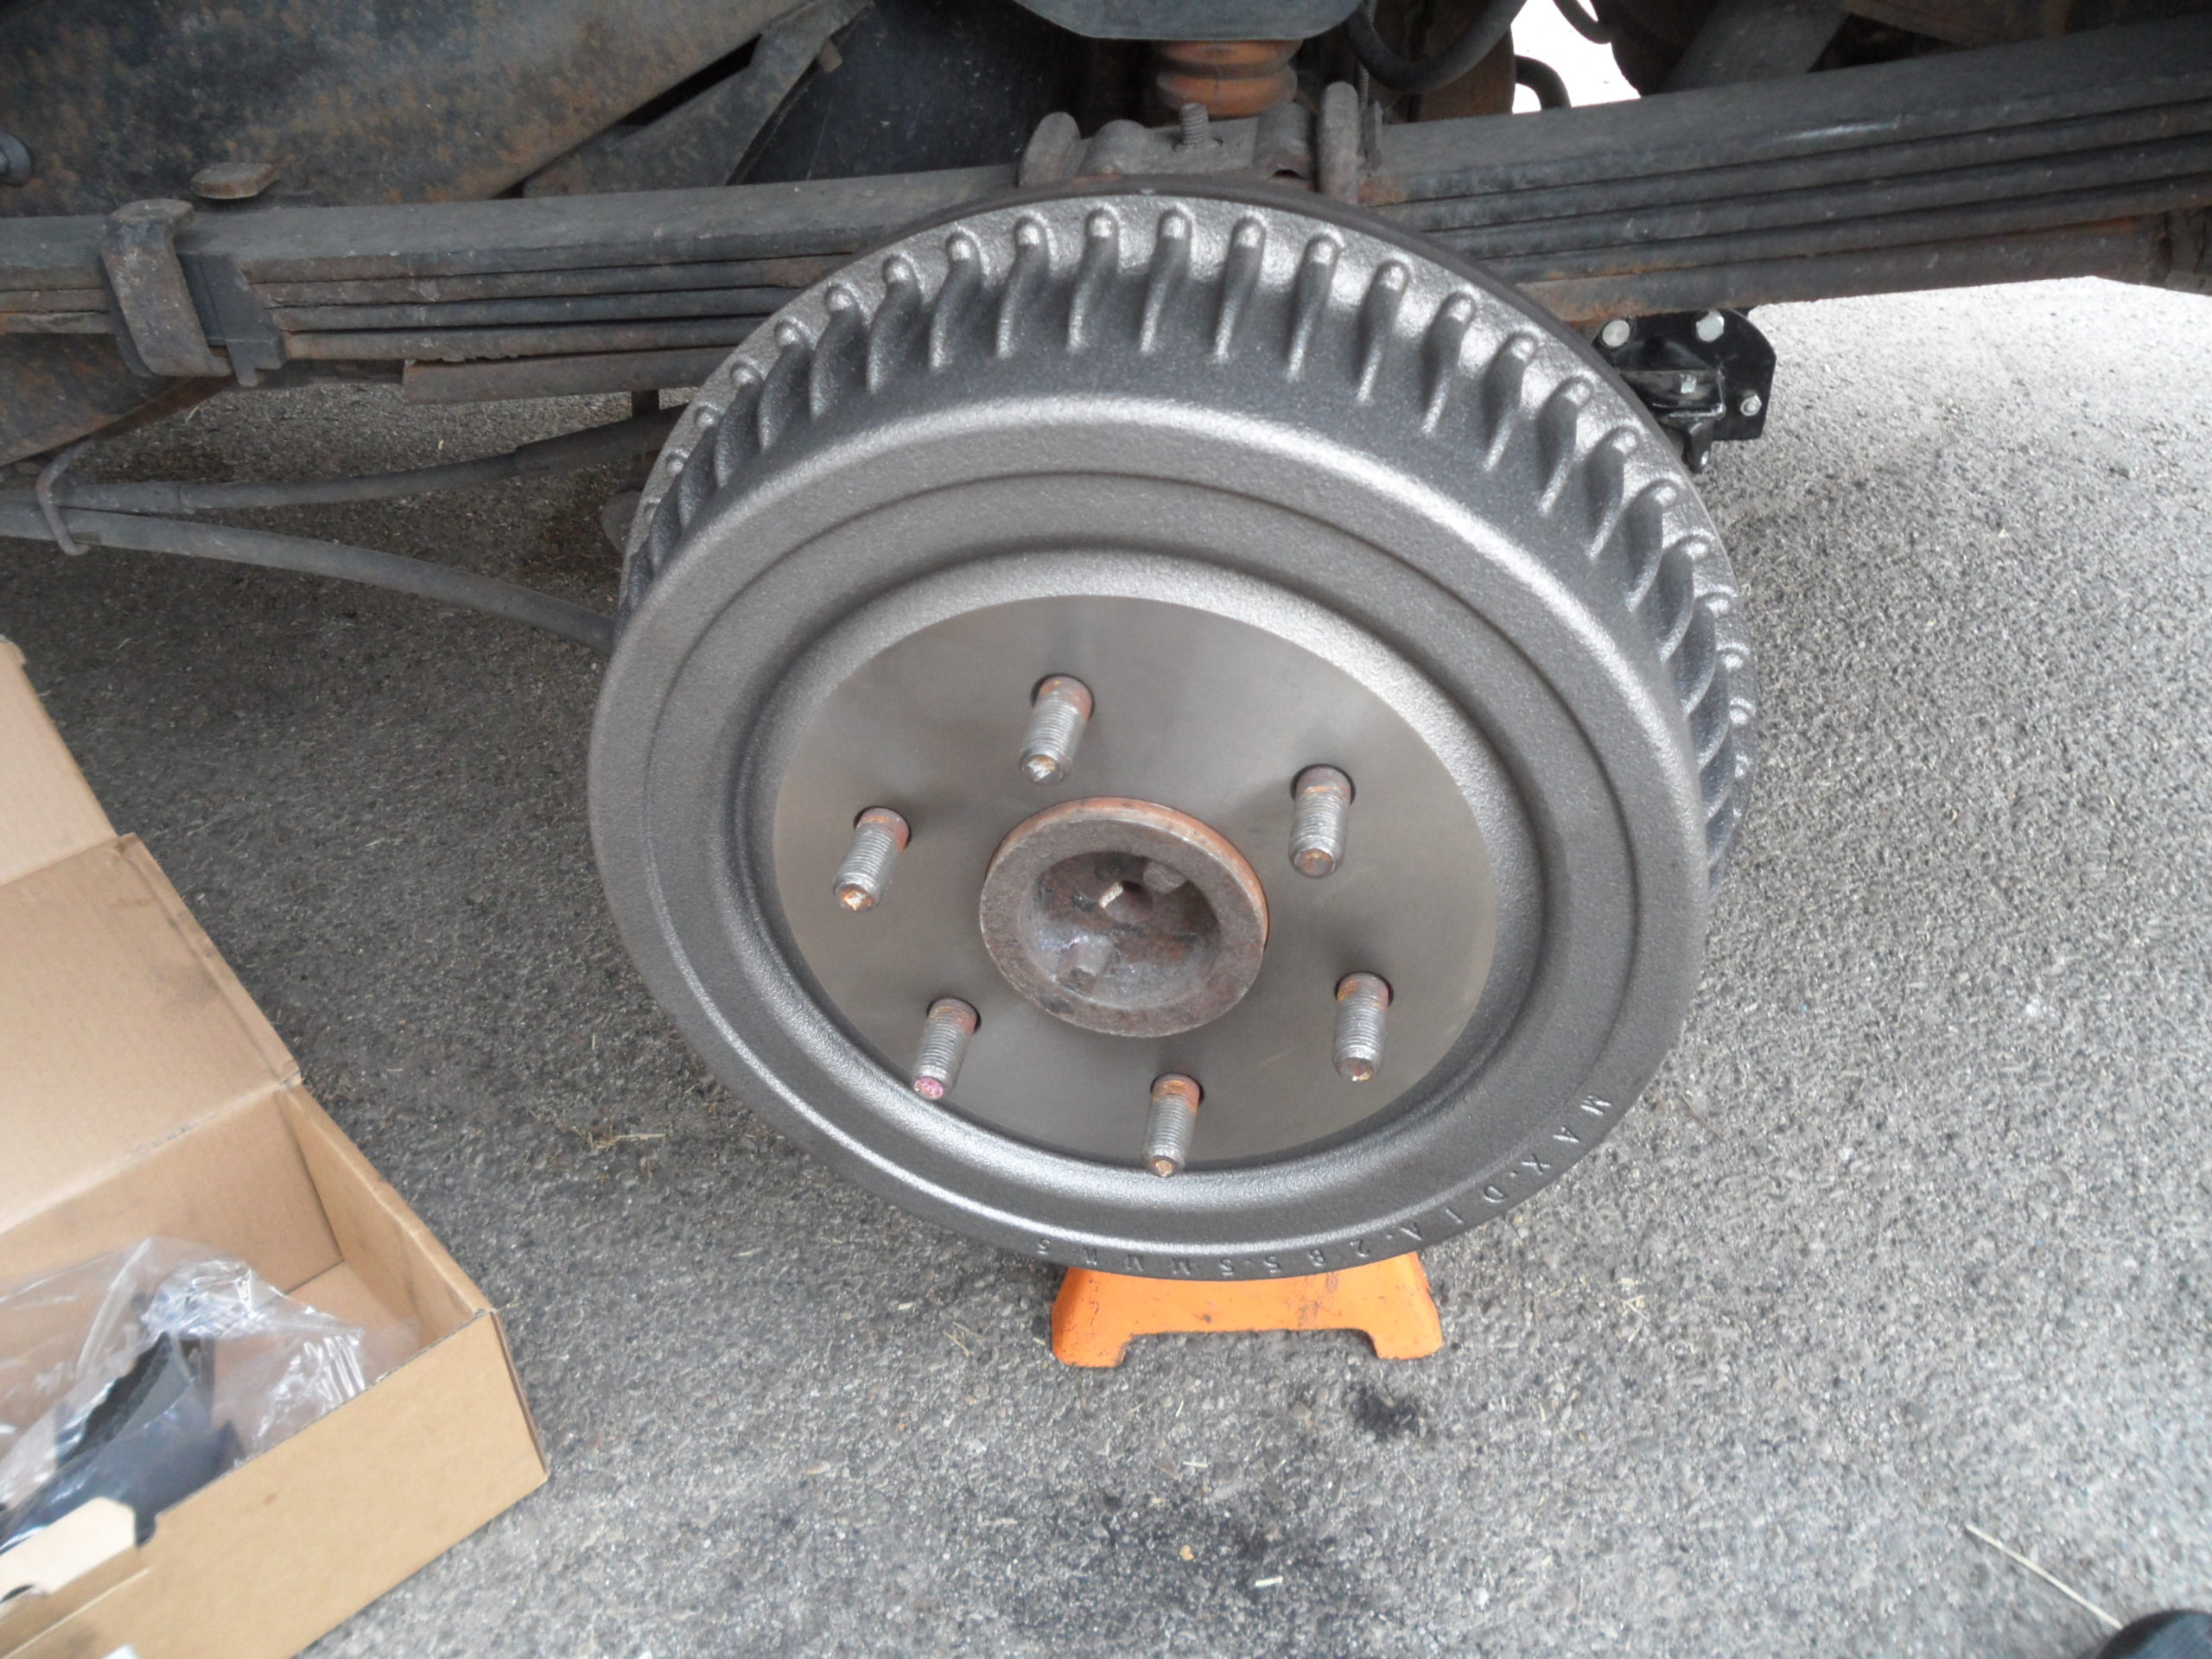
Once all these upper springs are safely in place I install my automatic adjuster. Now when putting the automatic adjuster with brand new shoes and drums, you have to turn the adjuster all the way down to get the drum to get over the new shoes. You will notice it will be VERY TIGHT. But this is normal. This is what happens with doing a drum brake system. You see pictured here the new drum on my driver’s side rear wheel. The drum is new and beautiful.

NEW DRUM is NICE!
Now over to the passenger side rear is the same as the driver side rear. Look at the pictures, it’s the same disassembly and re-assembly as the driver side. (Little note: the brake drums on this truck also apply to other GM vehicles full-sized, and those vehicles are – the GMC Yukon, Cadillac Escalade models.)

The old passenger side drum has seen better days.

The lock pins come through the back mounting plate.

Look closely at this adjuster! It’s out of place here. the hole you see here in the back mounting plate is where you can adjust the adjuster with a screwdriver. And the adjusting wheel is on backward’s So if you were going to want to adjust this from under the truck you wouldn’t see it.

Automatic Adjuster spring its purpose is to tighten the brakes shoes as you drive your vehicle thus you get a better stop and great life out of your brakes.

Proper placement of all springs.


Now with a brake drum system, you drive the car in reverse a short distance and do a panic stop twice about 6 to 8 feet apart and this will help seat the brake shoes and brake drums into each other. Then we take it for a victory cruise and see how well this beast stops! This beast now comes to a perfect and even stop like it did when it was new.

When re-installing your wheel you may want to use a lug wrench or something like a piece of wood to lift it without hurting yourself.


Tightening the lugs in a pattern


