
In this post, we want to show even the best-laid plans can go awry. But you can ALWAYS troubleshoot and fix these problems with a little patience. If you read part one of this installation then you know we had a grounding issue that wasn’t sending the signal from our camera to our stereo unit. After being confused by this project, I walked away from it and worked on other projects. So I could work it out in my head.
Once I figured out what the issue could be I was ready to go out and tackle it! While I was diagnosing the problem from the rear of the vehicle where the camera and its wiring starts is a good place to begin.
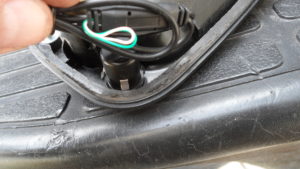
The camera is installed in our handle. ( Barn Door Vehicle)
I first started with removing the right rear door panel. Then I checked to be sure that my video and power connections were still connected. Following that connection to my taillight, where I had my “red” power wire hooked up to the positive side of my backup light and I had the “black” ground connected to the ground side of the same socket. Now my Black ground & Positive Red wires are in 1 wire you will need to stripe them apart into 2 individual wires. Making them 2 wires.
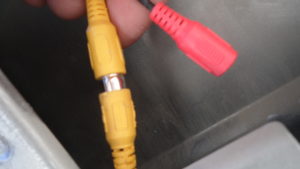
Backup wire connections Yellow is video it goes straight to the stereo unit, Red is our power/black ground wires
So remembering from the instructions that it mentioned you can connect your ‘black’ ground wire to either your ground on your backup light socket or body ground on the vehicle. So I figured it would be a much better ground if I did it to the vehicle itself!
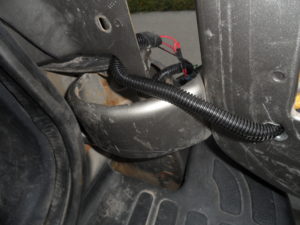
Wire harness from camera to taillight housing. to connect to the backup light wire positive. And our video wire also.
So first, I disconnect both the red and black connections from my backup light. I only spliced them anyways it was smart I did it this way! I will have to connect the ‘black’ to the ground of the vehicle. ( In part one if you recall I put my camera is in the door handle of my vehicle’s barn door.) Now that I realize I’m going to have to ground my camera’s black or ground wire to the vehicle, I’m going to have to extend this ‘black’ ground wire.
Having some wire ties holding my wires in place.
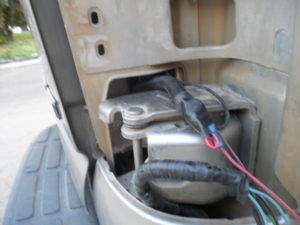
Camera Wiring Harness (top) going to our taillight housing. while the door is closed to check for clearance! taillight harness (bottom)
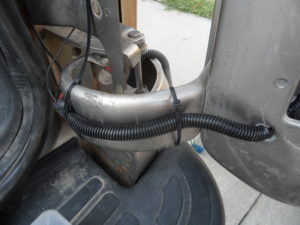
Now to finish this job. I first install some wire loom to cover my wire that is going to be exposed between the door and along the hinge to the taillight. Then I reconnect my positive or hot side to my backup light socket, and I find myself a good ground where my trailer hitch mounting bolts to the frame of my truck. Then I use a couple of plastic wire ties to attach the wire loom to my hinge and finish with pushing some of my wire loom into the hole in my door where I fed my wires through to give them some protection. And that clean look too.
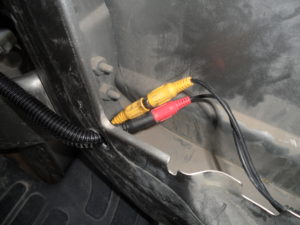
Camera & Video Connections. with wire loom.
Then I take a little black electrical tape to secure the opening of the wire loom, to keep our wires inside the loom. Now we get to test the camera with the stereo unit to see if all my work pays off YAY! it works. The only problem is we had to re-aline the angle of the camera’s view as it was looking behind us. And YAY!!!! Victory is mine!!! Victory back up lap!!!!
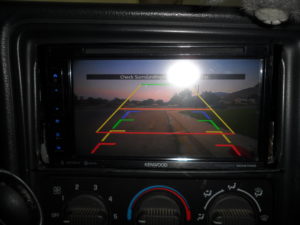
Camera Test We Have an Image!


