I’m hoping with this post to diagnose any future regulator uncertainties if my voltage regulator is working or not. Why is this? Because there are many times I’ve owned vehicles that had starting or charging problems or the generator dummy light would come on for unknown reasons. Now I know how to properly do this test because most local parts retailers, they don’t have a way to test these voltage regulators. Now I received an original auto repair manual from my Chevy Pickup that actually showed me with pictures and full description how you can make your own old school testing wires and a vintage volt reader as they used back in the days when my little truck was first built.
With having the right tool for the job, I was able to do this test with the proper voltmeter, but I also pulled out a test light for 12 volts and I pulled out a voltmeter that also shows you in analog and in digital how to do this test the digital way if it makes it easier for other people. If you don’t have a way to get a hold of voltmeter that is what they used on this truck back in the day. (As pictured)

I made the wires as described in the repair manual in the electrical system to test my voltage regulator. So when making these wires, follow the diagram and read the instructions carefully and it also helps if you have an old voltage regulator laying around as I did to test the connections and make sure everything fits before you do the test. When you are ready to do the test, everything will proceed smoothly
The first test I started, I connected my wires between my regulator and it’s plug connection. Then I brought in a voltmeter making sure my black lead is touching a clean ground and touching the positive probe to the voltage regulator but with this first test I did not turn on the ignition switch yet, all those tests turned out positive and then I had my wife get in the cab and turn the ignition on without starting the truck and then I retested and the tester showed a different number which was better but this time I tested voltage between regulator and charging wire from the alternator and we had a proper amount of voltage with my digital multi-meter then I switched over to my voltmeter and checking my ohms and we have the proper amount of ohms on that side also. Not bad for a 52-year-old truck!

This post proves why some of our neighbors are amazed and jealous because of how sweet this truck runs! I so wish I had done pictures of the harness I built for the charging system for the alternator, voltage regulator, and horn relay and the harness plugged right into the fuse box. That was one of my first attempts at building a wire harness because I couldn’t find one that was American made and it was one that took me a long time to build. The old one was fried pretty bad at the back of the alternator. So instead of attempting to splicing in a new plug for the alternator I just rebuilt the whole thing and at the time I built this harness, I was just trying to get to the bottom of my charging problem with the truck and it did solve the problem. So now I’m hoping with this post it will help others besides me of learning how to test the voltage regulator.

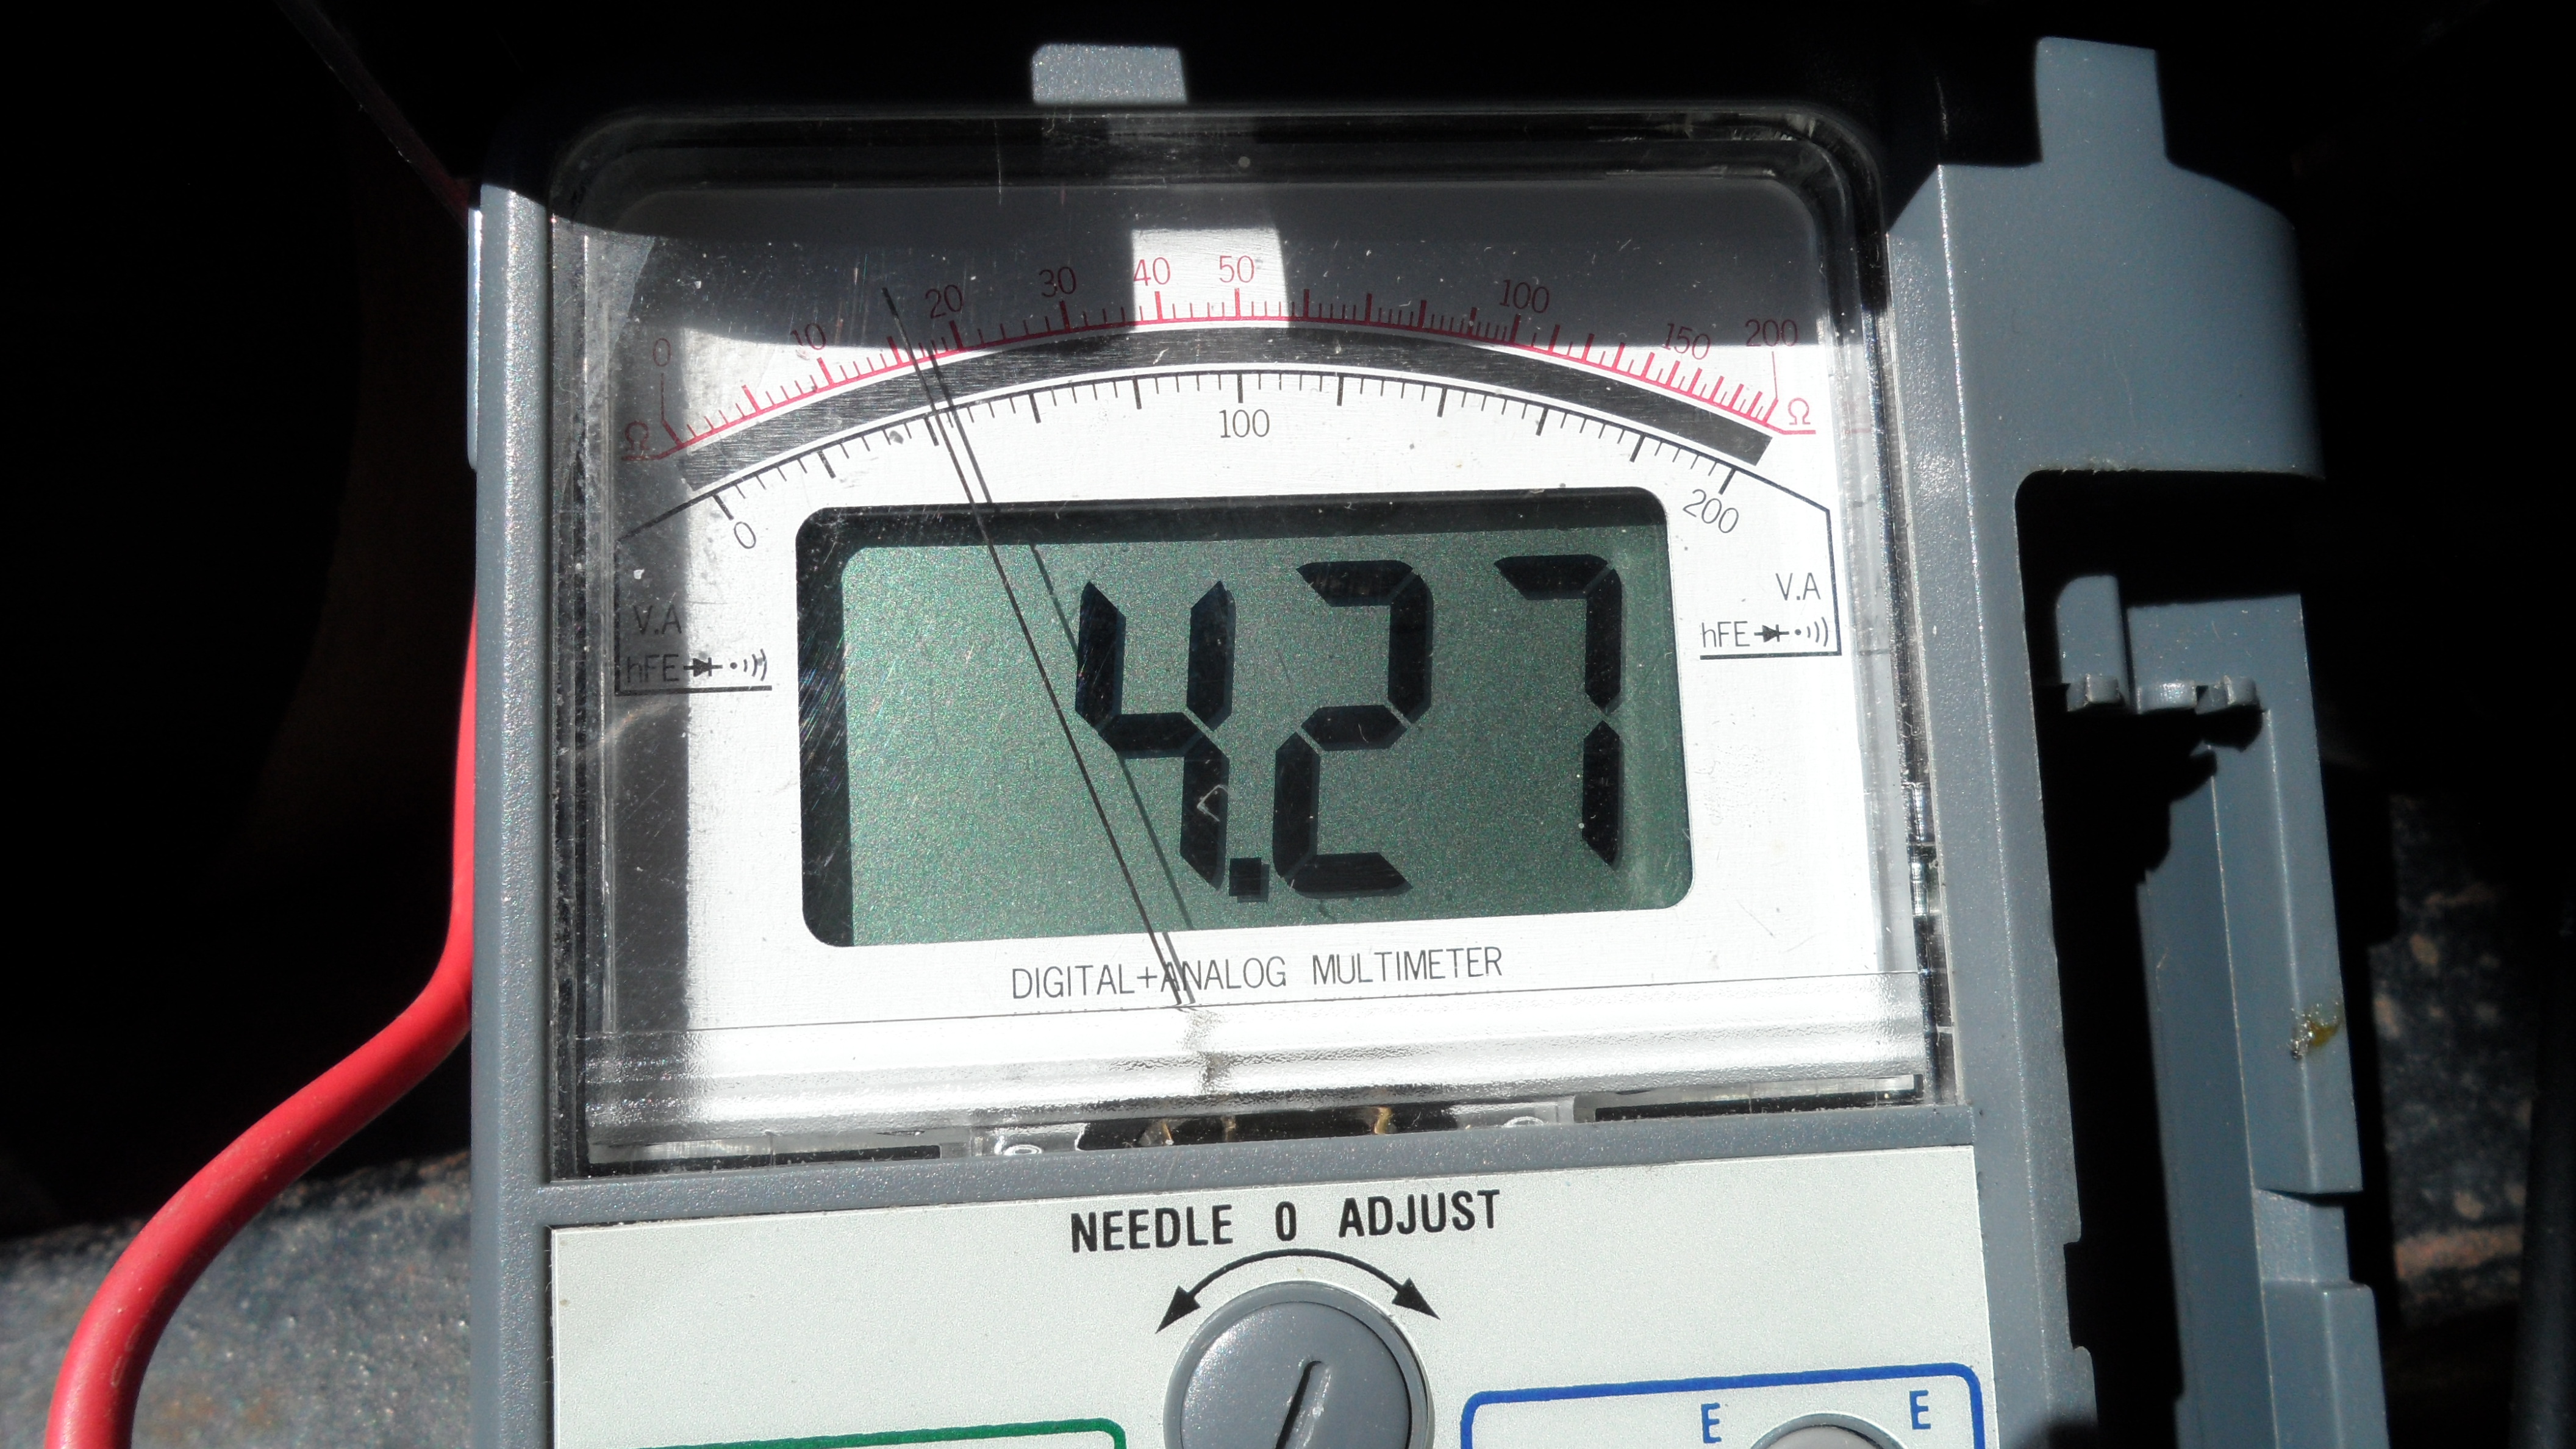
Ohm Measurements from testing the Regulator to Alternator.

Picture Shown with Test leads. From automotive repair manual.

Test leads from Repair Manual.

2 tests leads made as described from the repair manual.

Test Leads from Repair Manual.

Test Leads made from repair Manual.

Old Regulator w/test leads for test fit purpose only.

Testing the homemade leads from manual while installing in hardness and regulator

Alternator Testing while the truck is running. I did the regulator again.

Testing Alternator to the regulator.

testing with the test light.

testing from the regulator to a clean ground.

Testing just the regulator.

This is the ohms coming out of the regulator.


