I’ve been hearing a noise since we took the burb on a small trip. So I assumed it was the front brake pads grinding against the rotors. Why I thought this is because the brakes weren’t performing all that well for a truck of this size. There was also a pedal kickback while making sharp turns with it.
So from experience, I knew brake pads and rotors need to be checked out. What I found was a surprise and a shock at the same time! The brake pads had heat and stress cracks throughout both of them. It was time to order brake pads for my beast.
I came back from the parts store I did a thorough inspection of all other moving parts such as upper and lower ball joints, CV axle joints, and shocks, and hydraulic brake lines going to each wheel. Because this vehicle has a lot of miles on it I became concerned about anything else I should pay attention to while I have the front wheels off.
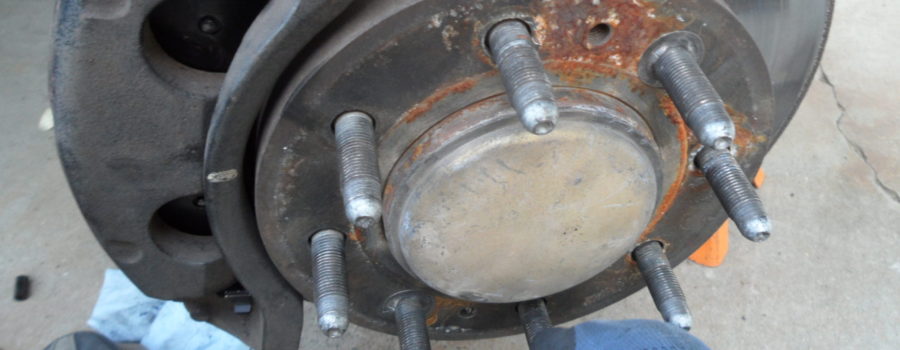
While working on the passenger front wheel everything looked fine except the hub assembly. The hub assembly is in very poor shape whereas the bearings are worn out. This repair will be taken care of in another post coming soon.
Before starting this project, the tools required for this are floor jack, jack stand, wheel chocks. (or a couple of big blocks of wood or big rocks) When using a floor jack proper placement and safety always come first. Be sure the jack is on a level surface and the cradle on your floor jack is properly placed under the vehicle. Then your jack stand should be in place as close to the floor jack and also in an optimum spot under the vehicle for safety.

Jack placement is very important here and safety should be number #1

When removing lug nuts be sure you have the weight off the vehicle with your jack till you loosen the lugs. Then raise it to remove your tire.

the jack’s placement is always important. Left front wheel or driver front
Now I loosen my bolts from the caliper, then I try to compress the pistons before I remove the caliper. So it will be easier to remove it from the rotor. ( Not pictured ) I used a small pry bar for this one. Once I had the caliper off, I hung the caliper up on the upper A-arm with a wire coat hanger. (Beware not to twist the brake lines when doing this) Then I remove my pads, now I can finish removing my shims off the caliper mounting frame.

Brake caliper mounting frame after the shims have been removed. And now removing the rubber boots

My caliper bolts are dry

rubber boots for the caliper bolts

Removing rubber boots with a number #1 screwdriver & a small hammer. Walk all the way around it working it out slowly.
Then I move on to removing the old rubber boots off the caliper frame then reinstall my new ones that came with my kit. My kit also came with some solid rubber hoses that act as a guide for the caliper pin that aid in keeping its alignment.

New Boots

Old boots

The old boot has scene lots of mileage.
Now this rubber hose, it’s inside the caliper mounting frame. If you happen to have a pick or a flat tip screwdriver #0 as I used, either one will work to grab the old hose out so you can put in the new one. Be sure to do this step before replacing the rubber boot. Now using a number #1 flat head screwdriver with a small hammer and go around the base of the boot will help you remove the boot from the caliper mounting frame.

removing guide hoses with my number #1 screwdriver. Or a pick could be used too.

New hardware kit I had to buy separately.
Once they are out I thought of a way to reinstall the new ones. So, I came up with a brilliant idea to use a 13/16’s impact socket which makes the new boot sit perfectly inside this socket to insert the new boot into the mounting frame with ease. If you have a problem popping it in, use a small amount of brake lube, it will help to pop it in with ease.

Seating area for the caliper boots clean it out if you see any debris in it.

New boot looking fine in its new place.

Re-installation of the boot with my 13/16ths impact socket

My new boot was inserted into my socket for install.
All I have to do now is use my 6″ C-clamp on my brake pistons to fully compress them so I can get the caliper to go over my new pads with ease.

C-clamp and caliper hanging on the A-arm while compressing it for re-install.

New pads looking fine. But they’re so BIG!!!

Careful placement of the C-clamp so as not to hit the bleeder valve.

brake caliper compressing w/ C-clamp and new brake pad.

Brake lube is really needed for this beast.
Now all there is left to do is to install the caliper bolts and remember to torque them down to 90 ft. pounds then reinstall the tire. Remove my jack stand that was under my truck along with my floor jack but I will lower it slowly so I can tighten my lug nuts without the full weight of the vehicle on it. Them once they’re tightened I can remove my floor jack.
And remember, do a victory cruise!

Ready to install the tire and take that Victory Cruise.

Brake job-ready for a cruise


